
* URP 연구를 진행하면서 프로토 타입을 만드는 중 Splash 화면을 구현하는 과정을 포스팅해보았습니다.
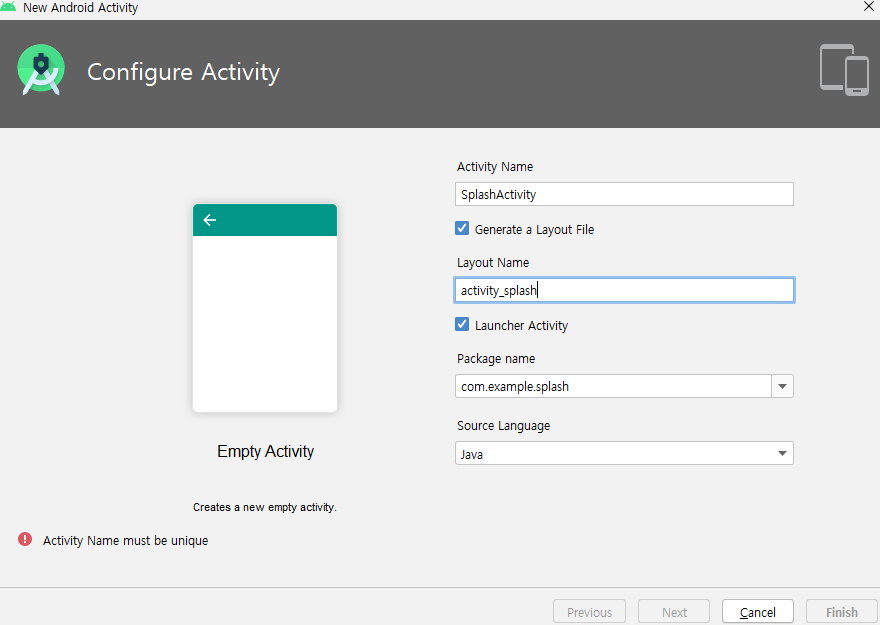
1. SplashActivity 만들기
사진과 같이 액티비티를 만들어 줍니다.
Launcher Activity를 체크함으로써 앱을 실행할 때 제일 먼저 실행되도록 합니다.
* 빨간 경고 표시가 뜨는 것은 이미 만들었기 때문입니다. 여러분들은 정상적으로 finish 버튼을 누르시면 됩니다.
2. values 폴더에 styles.xml 파일
- style을 추가하기 위해 넣고자 하는 이미지를 drawable 폴더에 복사합니다.
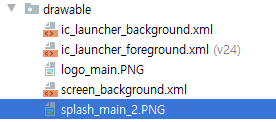
- drawable 폴더에 새로운 xml 파일을 추가합니다.
- item 태그 안에 위에서 불러온 이미지를 매치시킵니다.
- screen_background.xml
<?xml version="1.0" encoding="utf-8"?>
<layer-list xmlns:android="http://schemas.android.com/apk/res/android">

    <item
        android:drawable="@drawable/splash_main_2"/>


</layer-list>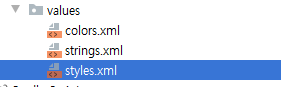
- 이제 스타일 코드로 들어가 봅니다. -> styles.xml
- <style> 태그를 하나 더 생성하시고 name="ScreenTheme"로 해줍니다.
- <item>은 방금 만들었던 drawable 폴더에 screen_background를 매치해줍니다.
<resources>
    <!-- Base application theme. -->
    <style name="AppTheme" parent="Theme.AppCompat.Light.DarkActionBar">
        <!-- Customize your theme here. -->
        <item name="colorPrimary">@color/colorPrimary</item>
        <item name="colorPrimaryDark">@color/colorPrimaryDark</item>
        <item name="colorAccent">@color/colorAccent</item>
    </style>
    <style name="ScreenTheme" parent="Theme.AppCompat.Light.NoActionBar">
        <item name="android:windowBackground">@drawable/screen_background</item>
    </style>
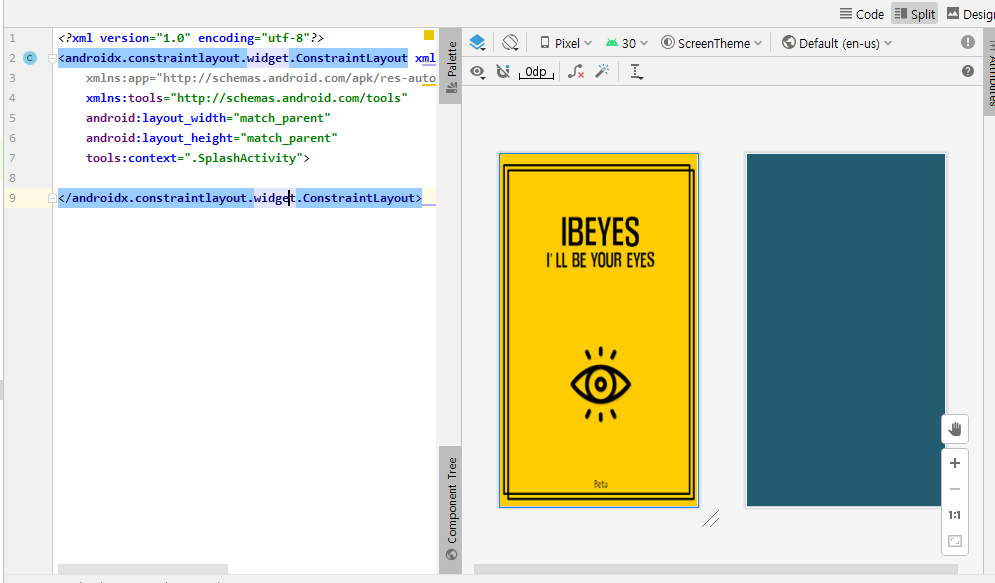
</resources>3. actvity_splash.xml
- 보시다시피 default 상태의 코드입니다.
<?xml version="1.0" encoding="utf-8"?>
<androidx.constraintlayout.widget.ConstraintLayout xmlns:android="http://schemas.android.com/apk/res/android"
    xmlns:app="http://schemas.android.com/apk/res-auto"
    xmlns:tools="http://schemas.android.com/tools"
    android:layout_width="match_parent"
    android:layout_height="match_parent"
    tools:context=".SplashActivity">

</androidx.constraintlayout.widget.ConstraintLayout>- 스타일을 추가했기 때문에 다음과 같은 화면을 볼 수 있습니다.
4. EmptyActivity로 MainActivity를 추가해주세요.
- MainActivity를 생성하면 자동으로 activity_main.xml 파일이 생성이 됩니다.
- 소스코드는 그대로 놔두시면 됩니다.
5. 1. 에서 만든 SplashActivity 코드 작성
- 일정 시간이 경과한 후 MainActivity로 넘어가고 싶으시다면 Handler를 사용하시는 걸 추천해드립니다.
- splashHandler라는 이름을 가진 innerClass를 생성해주시고 이 클래스는 Runnable 인터페이스를 implements 합니다.
- implement methods 오버라이드 하셔서 void run() 메서드 안에 가고자 하는 액티비티로 설정해주시면 됩니다.
package com.example.splash;

import androidx.appcompat.app.AppCompatActivity;

import android.content.Intent;
import android.os.Bundle;
import android.os.Handler;

public class SplashActivity extends AppCompatActivity {

    @Override
    protected void onCreate(Bundle savedInstanceState) {
        super.onCreate(savedInstanceState);
        setContentView(R.layout.activity_splash);


        Handler handler = new Handler();
        handler.postDelayed(new splashHandler() ,5000); //5초뒤에 다음 화면으로 넘어가기

    }

    private class splashHandler implements Runnable {
        @Override
        public void run() {
            Intent intent = new Intent(getApplicationContext(), MainActivity.class);
            startActivity(intent);
            SplashActivity.this.finish();
        }
    }
}6. Manifest
- 다음과 같이 SplashActvity 태그의 속성으로 테마를 styles.xml에서 만든 ScreenTheme 스타일로 적용해주시면 됩니다.
<?xml version="1.0" encoding="utf-8"?>
<manifest xmlns:android="http://schemas.android.com/apk/res/android"
    package="com.example.splash">

    <application
        android:allowBackup="true"
        android:icon="@drawable/logo_main"
        android:label="@string/app_name"
        android:roundIcon="@mipmap/ic_launcher_round"
        android:supportsRtl="true"
        android:theme="@style/AppTheme">
        <activity android:name=".SplashActivity"
            android:theme="@style/ScreenTheme">
            <intent-filter>
                <action android:name="android.intent.action.MAIN" />

                <category android:name="android.intent.category.LAUNCHER" />
            </intent-filter>
        </activity>
        <activity android:name=".MainActivity">

        </activity>
    </application>

</manifest>7. 실행화면
'Android' 카테고리의 다른 글
| [안드로이드 스터디 : 수강신청 앱 만들기] (2) | 2021.01.30 |
|---|---|
| [안드로이드 기초 : 버튼 사용하기] (0) | 2021.01.30 |
| [안드로이드 스튜디오 : 카메라 사용해보기(미리보기, SurfaceView)] (0) | 2021.01.30 |
| [부스트코스:안드로이드 프로그래밍] 4. 화면 내비게이션 (0) | 2021.01.30 |
| [부스트코스:안드로이드프로그래밍]프로젝트 C. 한줄평 화면으로 전환하기 (0) | 2021.01.30 |
* URP 연구를 진행하면서 프로토 타입을 만드는 중 Splash 화면을 구현하는 과정을 포스팅해보았습니다.
1. SplashActivity 만들기
사진과 같이 액티비티를 만들어 줍니다.
Launcher Activity를 체크함으로써 앱을 실행할 때 제일 먼저 실행되도록 합니다.
* 빨간 경고 표시가 뜨는 것은 이미 만들었기 때문입니다. 여러분들은 정상적으로 finish 버튼을 누르시면 됩니다.
2. values 폴더에 styles.xml 파일
- style을 추가하기 위해 넣고자 하는 이미지를 drawable 폴더에 복사합니다.
- drawable 폴더에 새로운 xml 파일을 추가합니다.
- item 태그 안에 위에서 불러온 이미지를 매치시킵니다.
- screen_background.xml
<?xml version="1.0" encoding="utf-8"?>
<layer-list xmlns:android="http://schemas.android.com/apk/res/android">

    <item
        android:drawable="@drawable/splash_main_2"/>


</layer-list>
- 이제 스타일 코드로 들어가 봅니다. -> styles.xml
- <style> 태그를 하나 더 생성하시고 name="ScreenTheme"로 해줍니다.
- <item>은 방금 만들었던 drawable 폴더에 screen_background를 매치해줍니다.
<resources>
    <!-- Base application theme. -->
    <style name="AppTheme" parent="Theme.AppCompat.Light.DarkActionBar">
        <!-- Customize your theme here. -->
        <item name="colorPrimary">@color/colorPrimary</item>
        <item name="colorPrimaryDark">@color/colorPrimaryDark</item>
        <item name="colorAccent">@color/colorAccent</item>
    </style>
    <style name="ScreenTheme" parent="Theme.AppCompat.Light.NoActionBar">
        <item name="android:windowBackground">@drawable/screen_background</item>
    </style>

</resources>
3. actvity_splash.xml
- 보시다시피 default 상태의 코드입니다.
<?xml version="1.0" encoding="utf-8"?>
<androidx.constraintlayout.widget.ConstraintLayout xmlns:android="http://schemas.android.com/apk/res/android"
    xmlns:app="http://schemas.android.com/apk/res-auto"
    xmlns:tools="http://schemas.android.com/tools"
    android:layout_width="match_parent"
    android:layout_height="match_parent"
    tools:context=".SplashActivity">

</androidx.constraintlayout.widget.ConstraintLayout>
- 스타일을 추가했기 때문에 다음과 같은 화면을 볼 수 있습니다.
4. EmptyActivity로 MainActivity를 추가해주세요.
- MainActivity를 생성하면 자동으로 activity_main.xml 파일이 생성이 됩니다.
- 소스코드는 그대로 놔두시면 됩니다.
5. 1. 에서 만든 SplashActivity 코드 작성
- 일정 시간이 경과한 후 MainActivity로 넘어가고 싶으시다면 Handler를 사용하시는 걸 추천해드립니다.
- splashHandler라는 이름을 가진 innerClass를 생성해주시고 이 클래스는 Runnable 인터페이스를 implements 합니다.
- implement methods 오버라이드 하셔서 void run() 메서드 안에 가고자 하는 액티비티로 설정해주시면 됩니다.
package com.example.splash;

import androidx.appcompat.app.AppCompatActivity;

import android.content.Intent;
import android.os.Bundle;
import android.os.Handler;

public class SplashActivity extends AppCompatActivity {

    @Override
    protected void onCreate(Bundle savedInstanceState) {
        super.onCreate(savedInstanceState);
        setContentView(R.layout.activity_splash);


        Handler handler = new Handler();
        handler.postDelayed(new splashHandler() ,5000); //5초뒤에 다음 화면으로 넘어가기

    }

    private class splashHandler implements Runnable {
        @Override
        public void run() {
            Intent intent = new Intent(getApplicationContext(), MainActivity.class);
            startActivity(intent);
            SplashActivity.this.finish();
        }
    }
}
6. Manifest
- 다음과 같이 SplashActvity 태그의 속성으로 테마를 styles.xml에서 만든 ScreenTheme 스타일로 적용해주시면 됩니다.
<?xml version="1.0" encoding="utf-8"?>
<manifest xmlns:android="http://schemas.android.com/apk/res/android"
    package="com.example.splash">

    <application
        android:allowBackup="true"
        android:icon="@drawable/logo_main"
        android:label="@string/app_name"
        android:roundIcon="@mipmap/ic_launcher_round"
        android:supportsRtl="true"
        android:theme="@style/AppTheme">
        <activity android:name=".SplashActivity"
            android:theme="@style/ScreenTheme">
            <intent-filter>
                <action android:name="android.intent.action.MAIN" />

                <category android:name="android.intent.category.LAUNCHER" />
            </intent-filter>
        </activity>
        <activity android:name=".MainActivity">

        </activity>
    </application>

</manifest>
7. 실행화면
'Android' 카테고리의 다른 글
| [안드로이드 스터디 : 수강신청 앱 만들기] (2) | 2021.01.30 |
|---|---|
| [안드로이드 기초 : 버튼 사용하기] (0) | 2021.01.30 |
| [안드로이드 스튜디오 : 카메라 사용해보기(미리보기, SurfaceView)] (0) | 2021.01.30 |
| [부스트코스:안드로이드 프로그래밍] 4. 화면 내비게이션 (0) | 2021.01.30 |
| [부스트코스:안드로이드프로그래밍]프로젝트 C. 한줄평 화면으로 전환하기 (0) | 2021.01.30 |